If you want to personalise your Play Pack on Volta adding your logo, any image, video or a second camera, here’s how:
💡 If you haven’t yet, please follow this tutorial to have an overview of Volta’s features and interface.
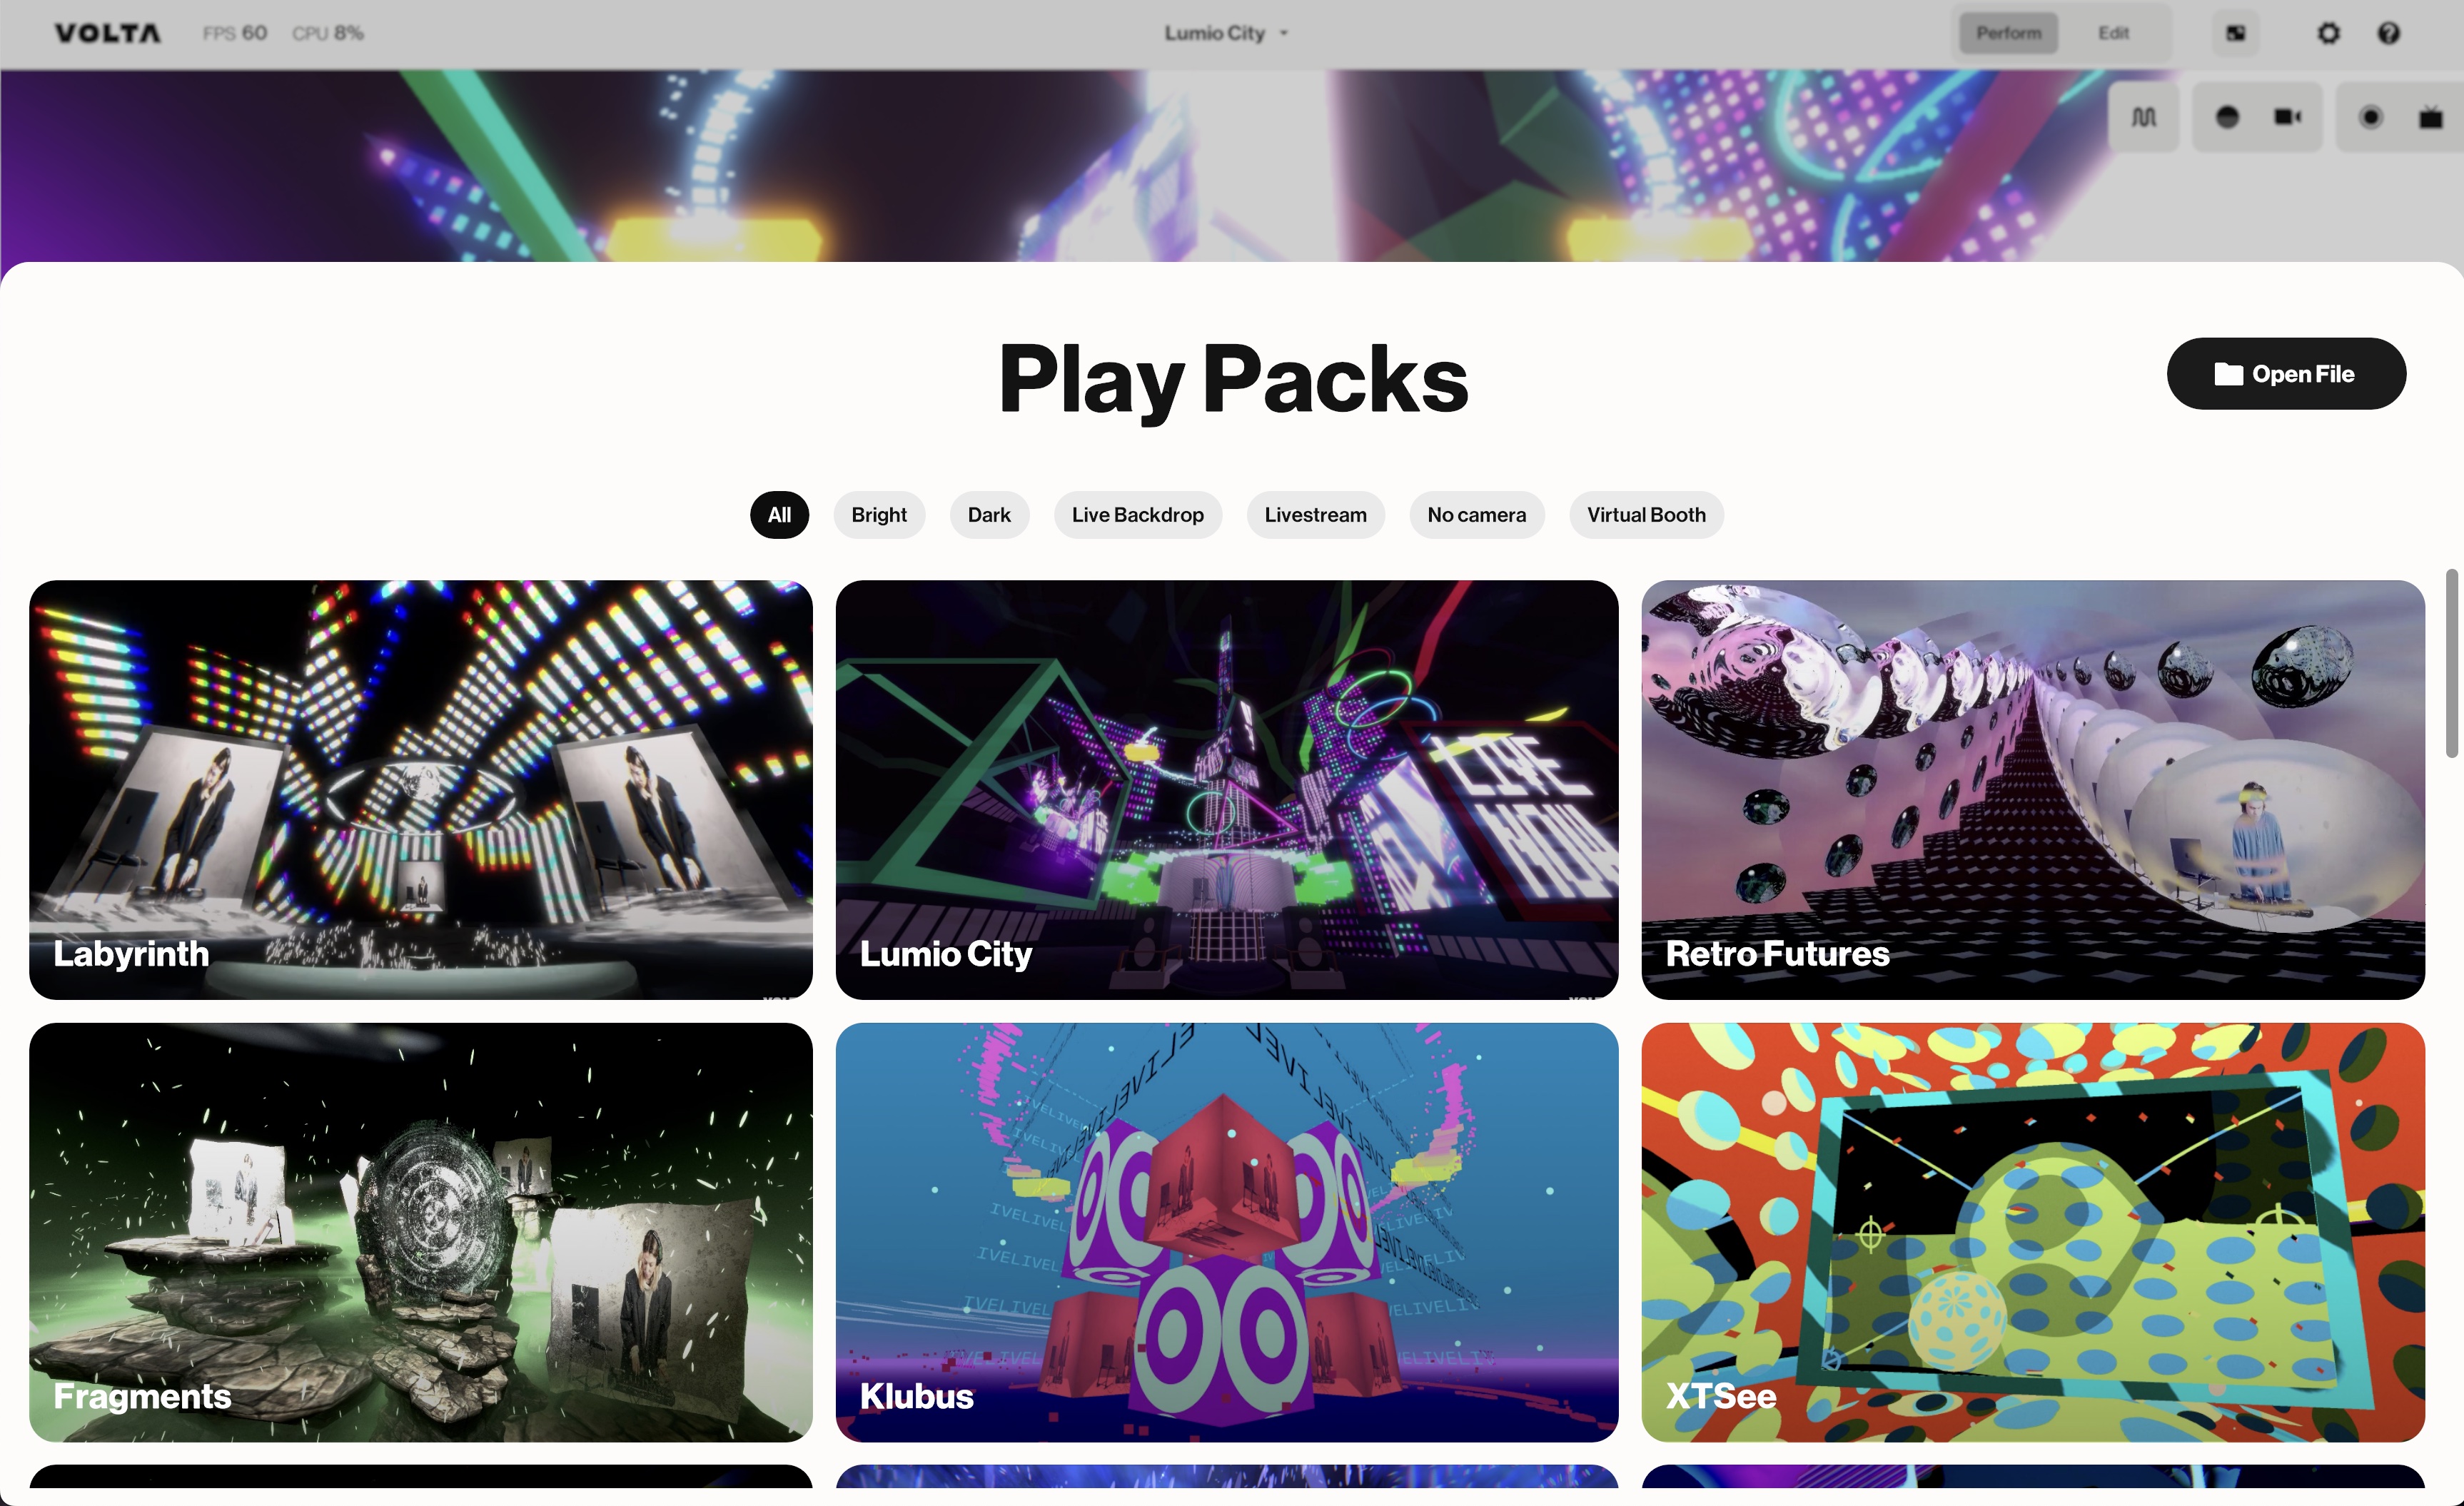
1. Pick from the Browser the Volta Pack you want to customise
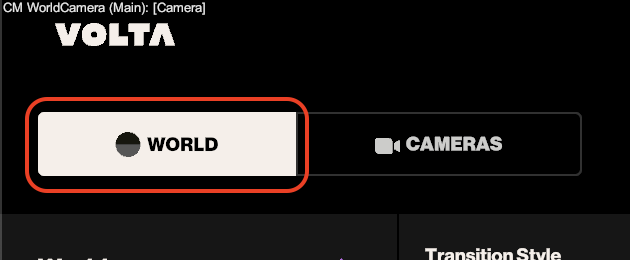
2. Click the Edit Button on the Top Nav Bar to switch to Edit Mode.

3. Access the Scene tab located in the top-left corner.
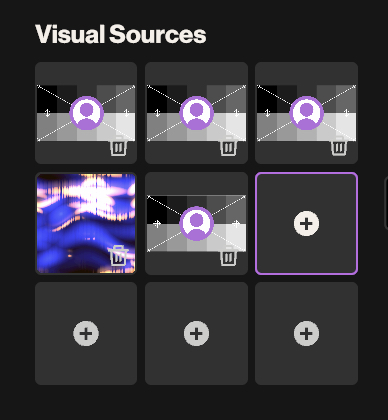
4. Click one of the + icons on the bottom-left grid to open the Visual Sources Browser.
5.1.1 Add a Webcam Visual Source (found in the Video Routing category). Refer to this tutorial for detailed camera configuration.
.png)
5.1.2 Select your second webcam from the dropdown in the Inspector on the right-hand side
💡 By default, Auto Resolution is selected, capturing the original resolution from the added visual source. For improved performance, opt for a lower resolution.
💡 If you have a DSLR camera, please follow this tutorial to connect it to Volta.
.png)
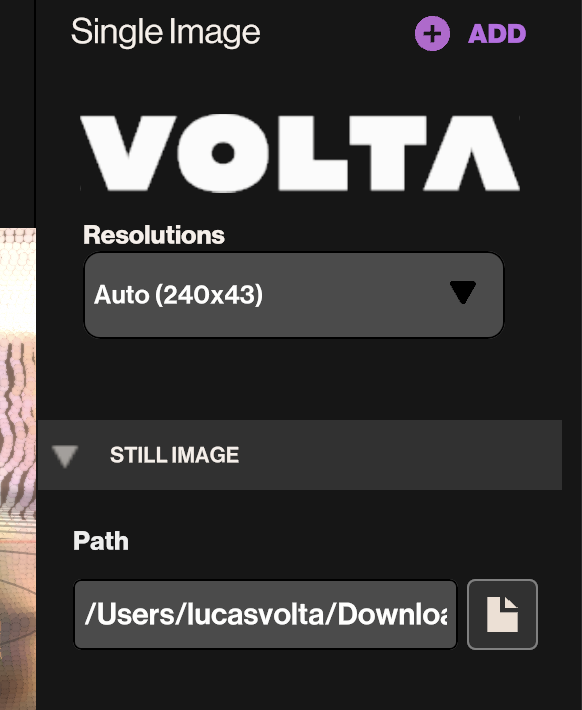
5.2.1 Add an Image or Video (located in the Local Media category) and click 'add visual source.’
💡 Accepted image formats: .jpg, .jpeg, .png. Other formats may load depending on your system.
💡 Accepted video formats: .mp4. Other formats may load depending on your system.

5.2.2 Select your image or video using the file-picker in the Inspector on the right-hand side.
💡 By default, Auto Resolution is selected, capturing the original resolution from the added visual source. For improved performance, opt for a lower resolution.
6. Assign the visual source to an element in the 3D Scene by clicking '+ Add' in the top-left corner to open the Element Browser.
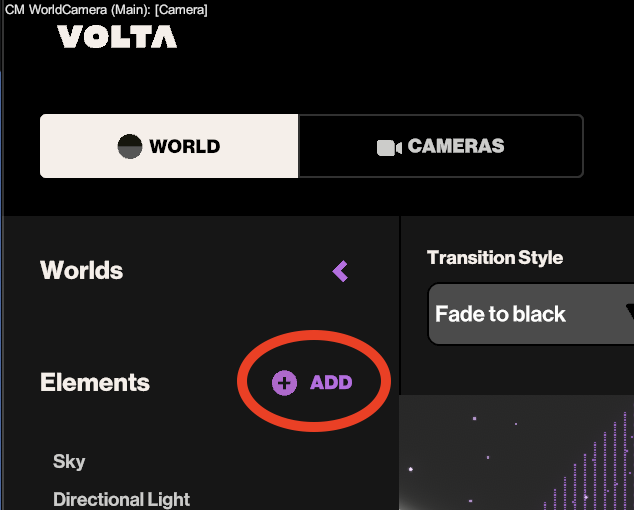
7. Add a 'Surface' Element from the Element Browser.
💡 There are other elements which you can add your visual sources to, but we’re doing this as an example. Not all visual sources can be added visual sources to.
.png)
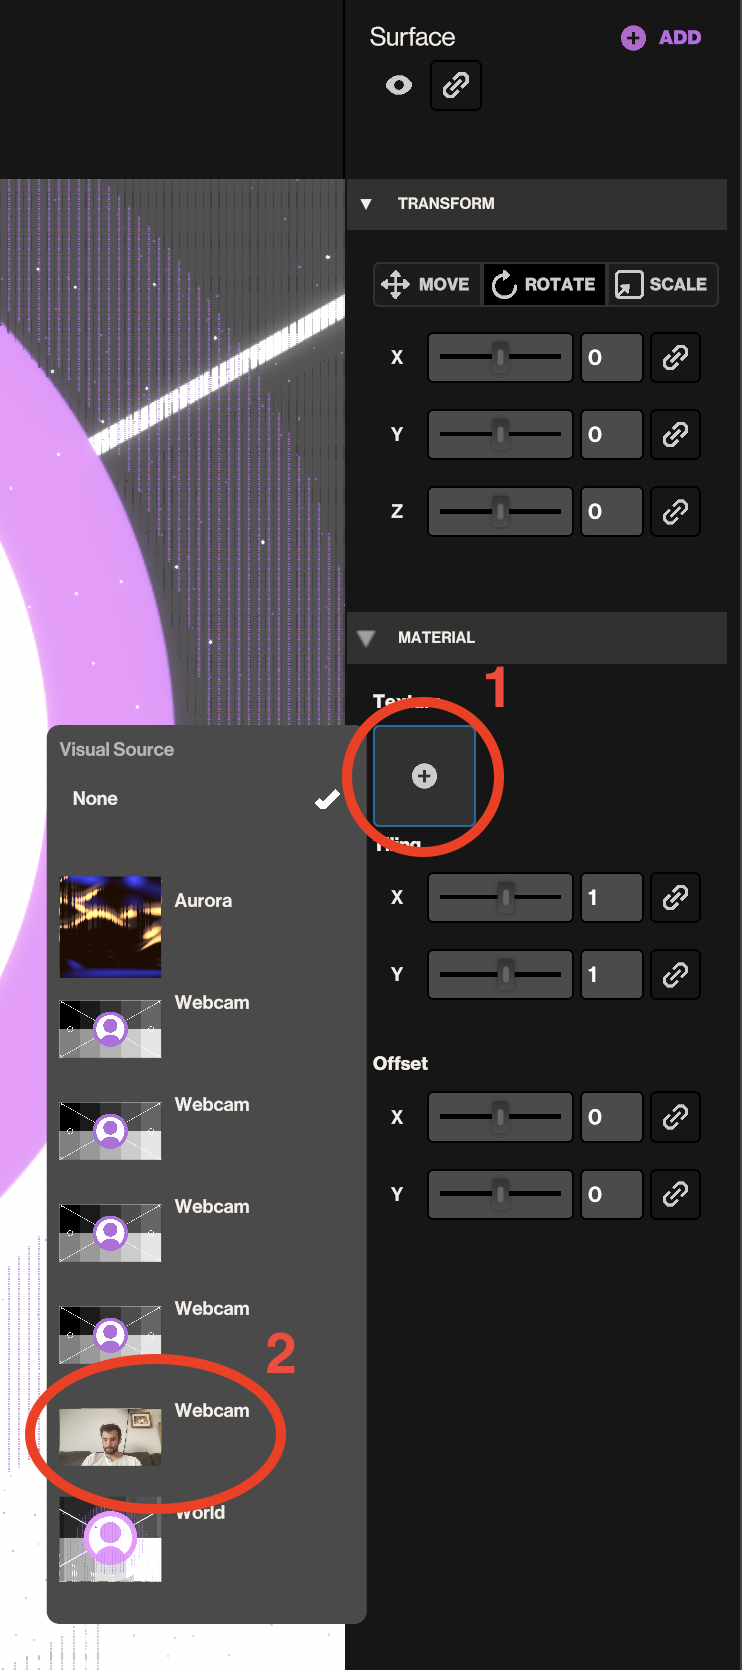
8. Click the '+' icon in the Texture box of the Inspector on the right-hand side and select your second Webcam or Image from the dropdown.
💡 On other elements, "Texture" can have another name such as "Visual Source", "Channel" or "Base"
9. Position the Surface element using the X, Y, and Z properties in the Move section. Adjust by typing the desired number, dragging on the “X”, “Y,” or “Z,” or by dragging the element directly on the 3D view.
.png)
💡 Disable the Performance Camera system if needed to see the Element you are positioning. Click 'Cameras' in the top-left and then the 'Enable Cameras' toggle on the bottom-left.
.png)
10. If the Pack has multiple Scenes, repeat the process for each Scene. Switch Scenes from the drawer at the top of the screen.
⚠️ Known issue: when reopening and switching between scenes with multiple cameras, cameras may de-format. We’re currently working to remove this issue.

11. Save your edited Pack from the central menu on the top bar

12. Click 'Perform' to exit Edit Mode.

Do you still have questions?
Please feel free to contact us, and we'll be happy to help clear things up for you.


